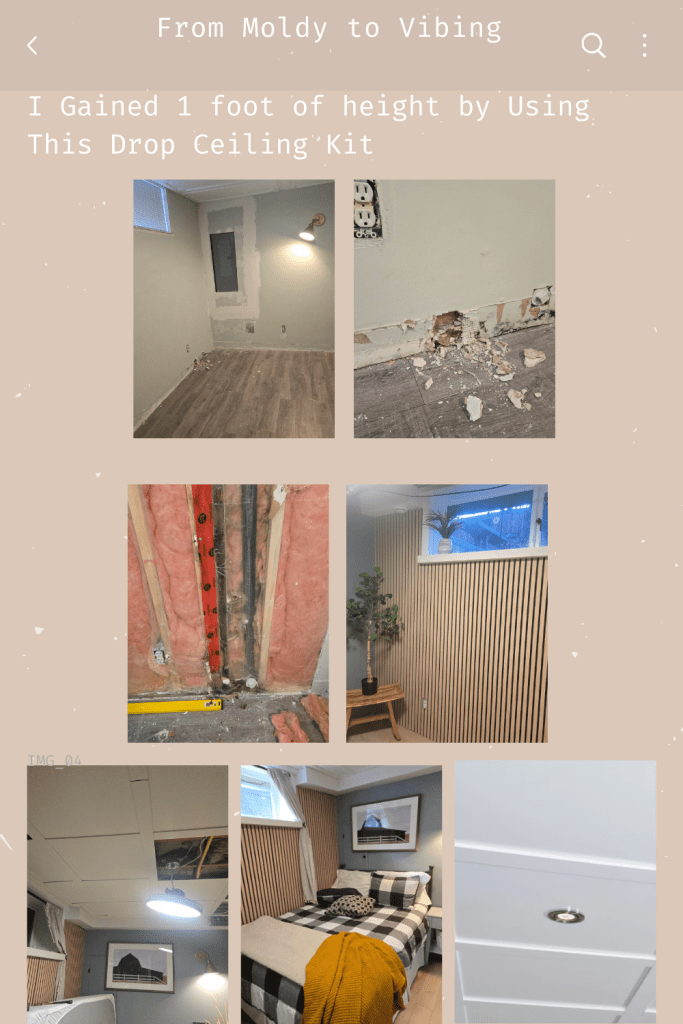
When I first planned to give my stepson’s teenage bedroom a quick refresh, my goal was simple: slap on a fresh coat of paint, maybe swap out some décor, and call it a day. What I didn’t expect was for that “quick” job to turn into a full-scale renovation that revealed hidden mold, a leaking pipe behind the walls, and a whole new appreciation for doing things right. If you’re facing a similar basement bedroom makeover (or thinking about one), here’s the full story — what went wrong, what we fixed, what we used, and everything I learned along the way.
The discovery: paint wasn’t going to cut it It started like many “easy” projects: pick a color, cover scuffs, make the room feel fresh. Once I started cutting in around a corner, I found soft drywall and a faint but unmistakable musty smell. Closer inspection revealed mold and signs of moisture damage. Pulling back the drywall showed the culprit: a leaking pipe tucked behind the wall. Suddenly the project became less cosmetic and much more structural — we had to remove the affected sections down to the studs to fully assess and fix the problem.
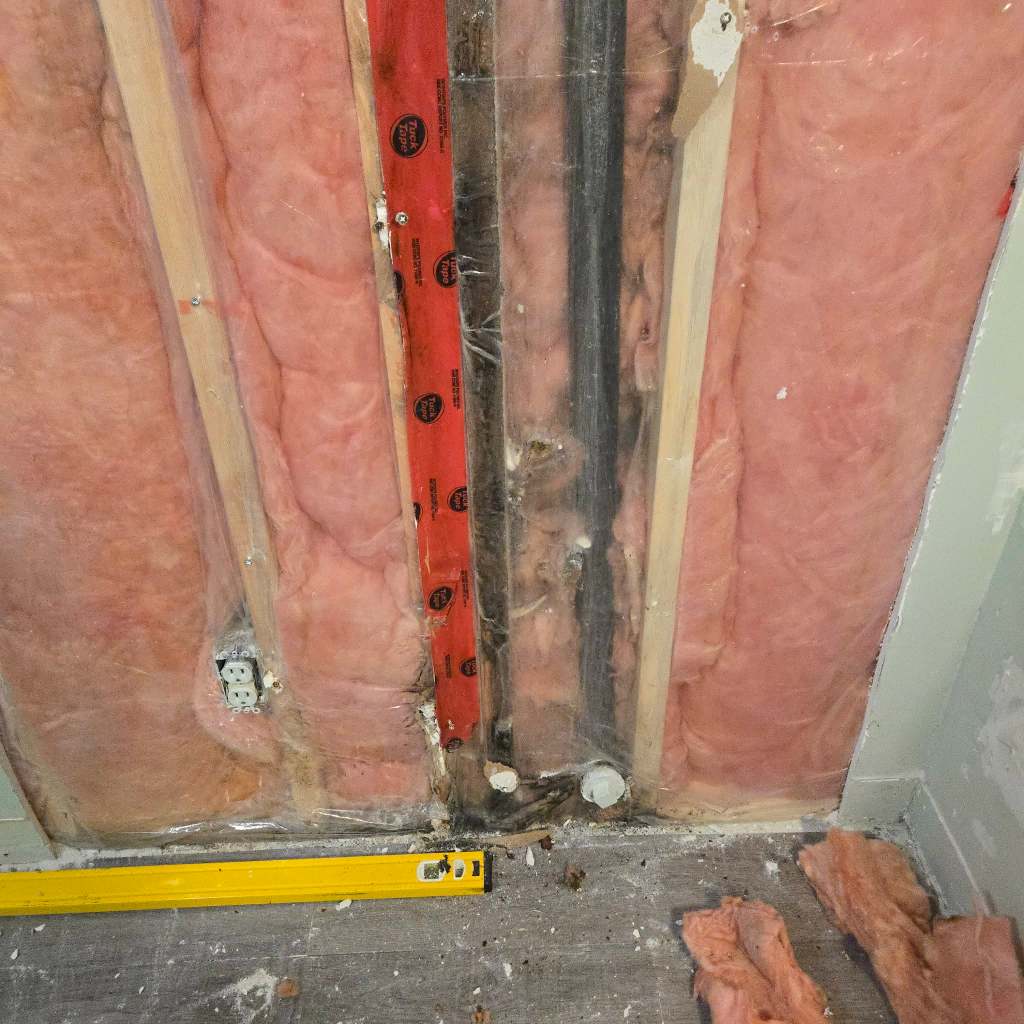
Demo and repair: down to the studs It’s never fun, but demo was necessary. We removed the damaged drywall, insulated any exposed areas as needed, and had a plumber repair and re-route the leaking pipe to prevent future issues. Once the plumbing was fixed and the framing checked for integrity, we replaced insulation where needed and installed new drywall. Taking everything back to the studs felt like a reset — a chance to do things properly and get a clean, healthy space for my stepson.
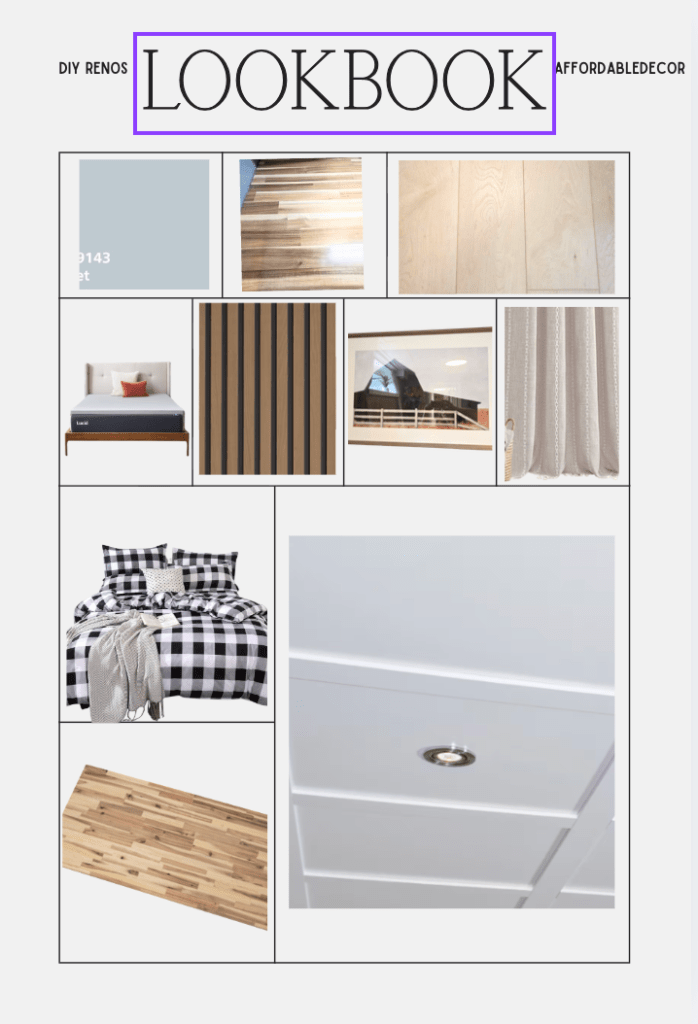
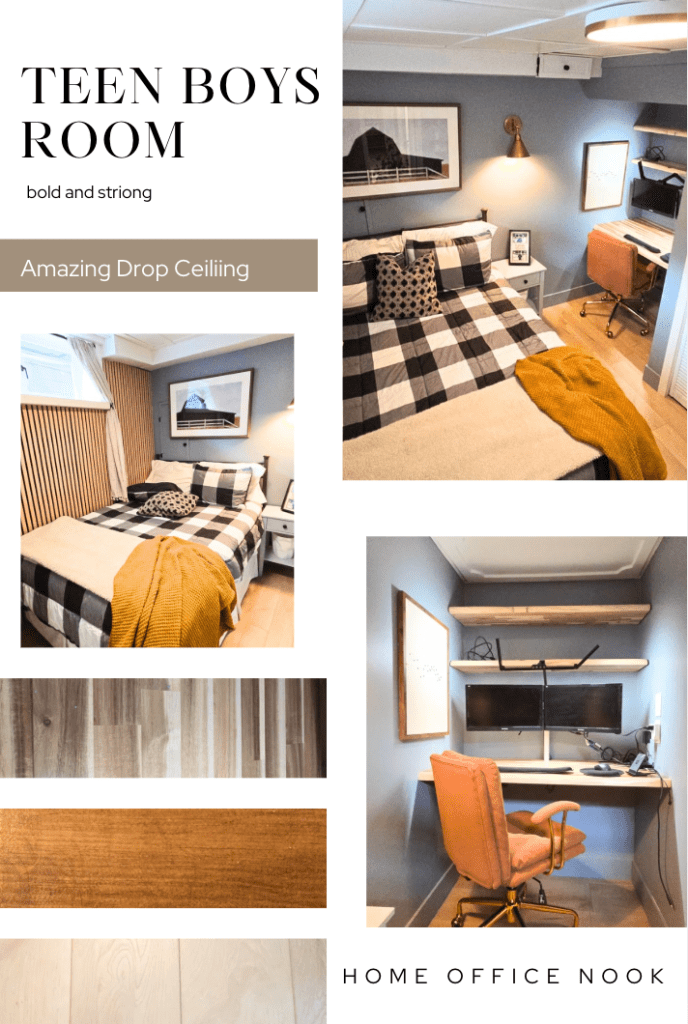
Flooring: durable, modern, and practical With the walls sorted, it was time for the floors. We chose vinyl plank flooring from Costco — a perfect basement-friendly option. The planks are waterproof (great for a basement), durable for a teen’s life, and much quicker to install than tile or hardwood. The look is modern and warm, and the maintenance is simple: sweep, damp-mop, done.
Walls and color: Cadet Blue by Sherwin-Williams For paint, I landed on Cadet Blue by Sherwin-Williams. It’s a moody, calming blue-gray that reads modern without feeling cold — perfect for a teen who wants a grown-up space with personality. After the drywall was installed and primed, two coats of Cadet Blue transformed the room into something cohesive and restful. The darker tone also helped to visually anchor the space and make the wood paneling accents and shelving pop.
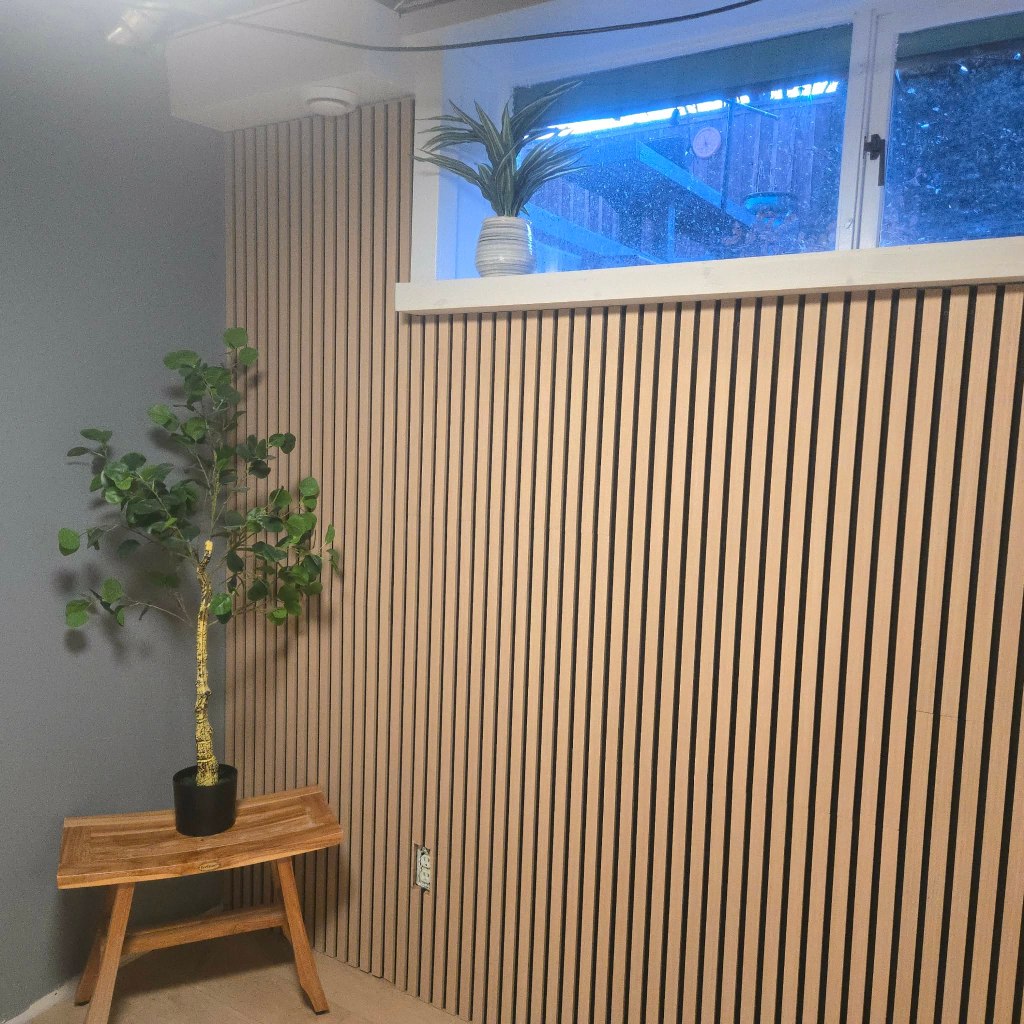
Acoustics: noise-canceling wall panels Because it’s a basement and because teenagers — noise — I installed noise-canceling acoustic wall panels. They’re not just functional; they also add texture and depth to the room. We placed them strategically near the desk nook and on one accent wall to reduce echo and improve sound control for study sessions, gaming, or music. The panels are simple to mount and make a noticeable difference in the room’s acoustics.
Ceiling: Embassy drop ceiling kit from HomeDepot.ca One of the smartest upgrades I made was swapping the old low ceiling for a new drop ceiling using the Embassy ceiling kit from HomeDepot.ca. The kit was surprisingly easy to install and gave us an entire extra foot of height — a game changer in a basement room. That extra height opened up the space, made it feel less claustrophobic, and gave me room to add better lighting. The kit’s instructions were straightforward, and installing it didn’t require specialized tools beyond basic carpentry supplies. If you’re renovating a basement bedroom and need quick clearance and a clean finish, that Embassy kit is worth considering.
Office nook: functional, stylish, and compact Because my stepson needs a place to study and do his projects, I carved out an office nook. I installed a raw-edge wooden desk and matching shelving — the natural grain and live edge bring warmth and personality into the room. The shelves are deep enough for books, game consoles, and display items, while the desk provides a comfortable workstation. For the chair, I picked a compact, ergonomic computer chair from Amazon — comfortable for long study sessions but small enough to fit the nook without overwhelming it.
Finishing touches and styling After the major elements were in place, it was time for details: layered lighting (a mix of recessed can lights and a directional desk lamp), a comfy rug to soften the vinyl planks, and a few personal touches — posters, a corkboard for reminders, and storage baskets for gear. The wood-panel accent wall contrasts nicely with the Cadet Blue walls and raw-edge shelving, creating a balance between modern and rustic.
Lessons learned and tips
- Don’t ignore strange smells or soft drywall. What looks cosmetic can hide structural or moisture issues.
- If you find mold or water damage, stop and address the source (plumbing, leaks) before rebuilding. Fix the cause first.
- For basements, waterproof vinyl plank flooring is a practical, stylish choice. Costco has good value options.
- An elevated drop ceiling kit like Embassy can be a fast way to gain height and improve the room’s feel — check clearances and local codes first.
- Acoustic panels are underrated: they improve comfort and make the room more livable, especially for audio or long study sessions.
- Raw-edge shelving adds character without being expensive; shop local or online for sustainable pieces.
- When buying furniture (like a small computer chair), balance ergonomics with size for a teen’s room
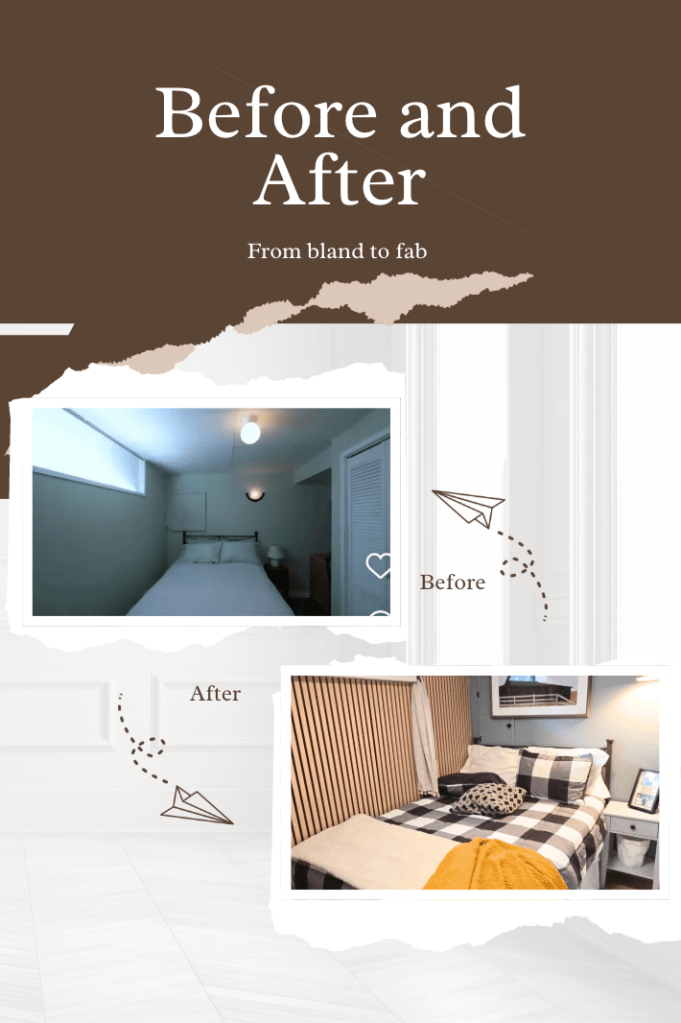
The outcome: a transformed, livable space What started as “just paint” turned into a full renovation that left us with a safer, quieter, and much more functional bedroom. The space now has a modern floor that stands up to wear, walls in a calming Cadet Blue, improved acoustics, and a ceiling that actually feels like a ceiling — not a basement afterthought. The office nook is a favorite feature: compact but perfectly suited to studying and gaming. Most importantly, it’s clean, dry, and comfortable — exactly what you want when you’re redoing a basement bedroom for a teen.

Leave a comment